Introduction
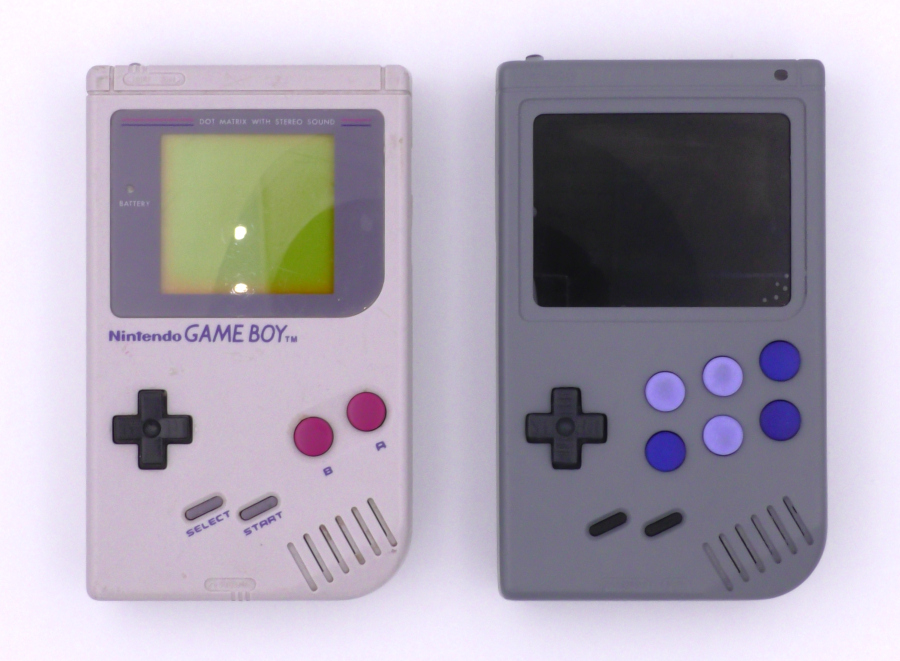
The PiBoy DMG is a kit that transforms a Raspberry Pi 4 in to a Gameboy inspired handheld. This handheld is the same size as the original but feature a 3.5″ color LCD screen. The system can run a wide range of games from multiple platforms because it runs RetroPie which is a frontend to a large collection of video game system emualators. A large internal battery allows for hours of gameplay and the built-in charger makes getting back to gaming simple.
Video
3.5″ LCD screen
The PiBoy DMG features a 3.5″ color LCD screen with a resolution of 320 by 240 pixels. This screen is the exact same size as the one used in the original gameboy.
DPI mode
The interface between the Raspberry Pi and the sceen uses what is known as a DPI (Display Parallel Interface) interface. This is a faster interface than the commonly used SPI interface found in other Raspberry Pi based prodcuts. DPI allows the PiBoy to reach a full 60 frames per second framerate for games that require it.
HDMI out
The PiBoy has a mini sized HDMI output so that the gaming action can be extended to a TV or monitor.
Controls
8 Gameplay Buttons
This iteration of a handheld gaming systems has a total of 8 buttons that can be used for gameplay. There are six buttons on the front of the case and a pair of shoulder buttons on the back.
D Pad
A classic style D Pad can be found on the left-hand side of the system and is the same size as the original.
Start and Select
As with the original gameboy there are dedicated Start and Select buttons.
Configurable
All of the buttons on the handheld can be mapped globally or specific to each game. Unhappy with the way the orginal game played? Make it custom and make it your own!
High Quality Silcone
The D Pad and all 8 buttons are backed by high quality silicone that emulates the feel on the orginal handheld.
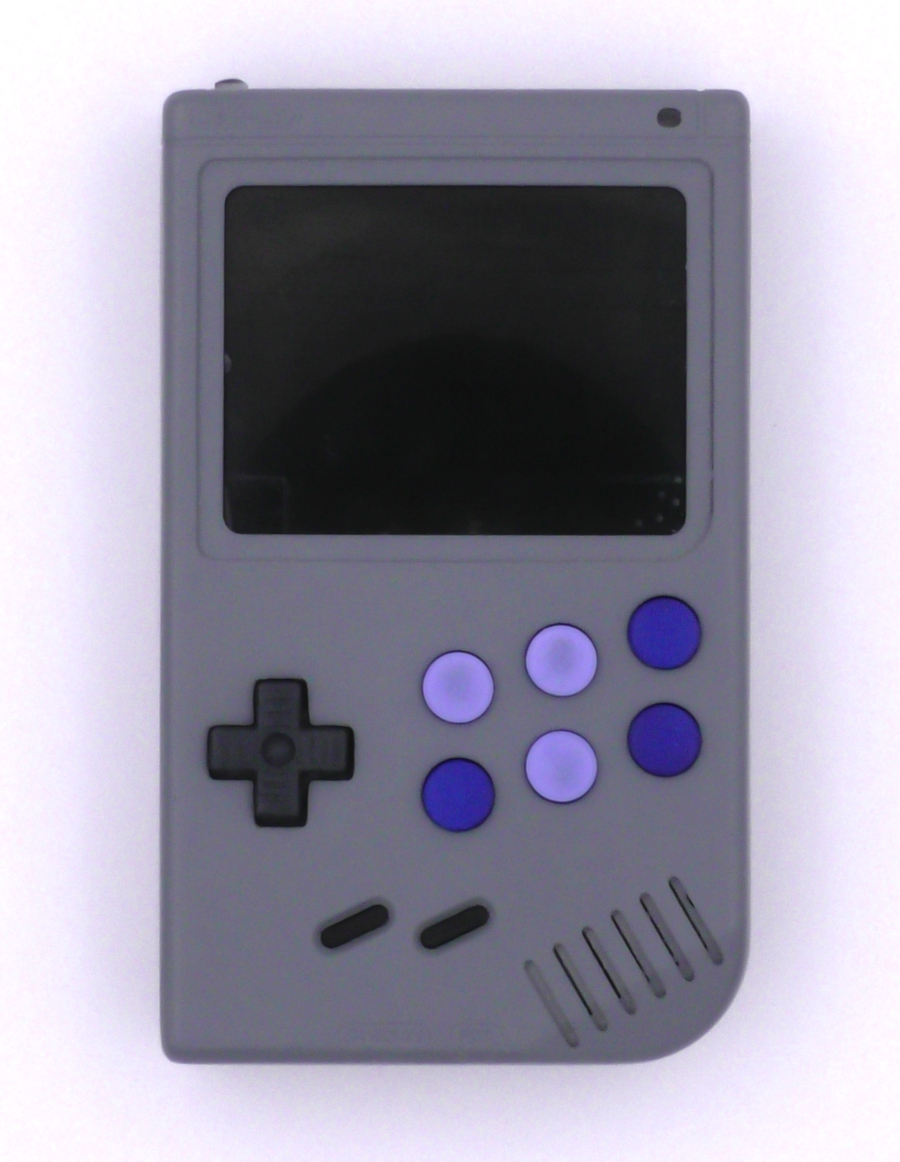
Figure 5: The current prototype of the PiBoy assembled.
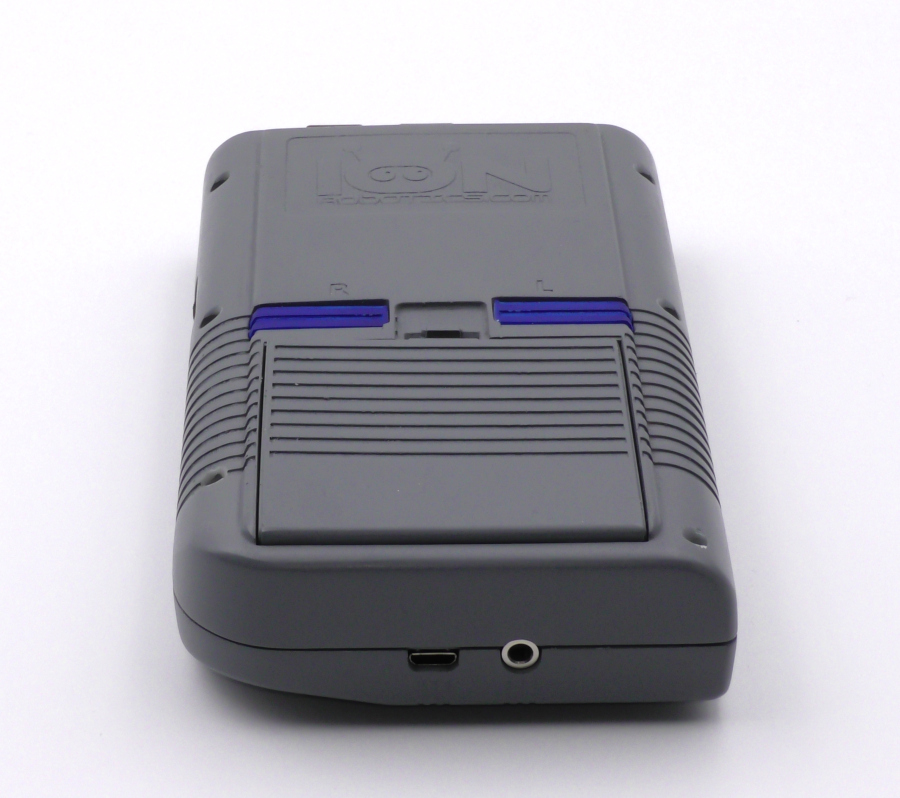
Figure 5: The current prototype of the PiBoy assembled.
Power
Lithium Polymer Battery
The PiBoy is powered by a high capacity Lithium Polymer (LiPO) battery for hours of reliable gameplay. Replacement batteries can be easily found anywhere quality electronics are sold.
Built In Charger
The handheld feature a built-in charger capable of quickly charging the internal battery. To charge the battery simply connect a USB charger to the micro USB port.
Battery Protection
The system features a handful of safety features to protect the battery and the SD card of the Raspberry Pi. When the battery reaches a miniumum voltage the system will turn itself off to protect tha battery. When shutting down the handheld will properly shutdown the operating system instead of simply removing power abruptly. This protect against the SD card on the Raspberry Pi from becoming corrupted.
Available as Kit
Easy to Assemble
The PiBoy comes as a kit that can be easily assembled by anyone. The only thing you need to provide is a Raspberry Pi 3 and a micro SD card.
Audio
Speaker
The sound of your favorite classic games can be heard loud and clear from the amplified speaker built in to the PiBoy.
Audio Jack
For times when a speaker isn’t appropriate you can use the 3.5mm audio jack to pipe sound to a pair of headphones.
Volume Control
The PiBoy also has a handy volume control to crank up the audio or lower is to a whisper.
Software and Configuration
RetroPie
The PiBoy hardware runs RetroPie which features an easy to use inteface for dozens of emulators allowing you to play games from multiple generations of gaming hardware.
Customizable Controls
The combination of the PiBoy’s 8 buttons and RetroPie’s flexibility allows you to create a custom control scheme for any game you choose.
Additional Features
We’ve also added custom settings that allow you to control the power saving features of the hardware. You can choose when to turn off the display and when to shutdown the system to extend your battery life.
Development Snapshots
Development of the PiBoy has been an interative process of several prototypes and a large number of changes over time. One of the primary challenges was making a Raspberry Pi 3 fit in to a case that kept the same size and feel as the original handheld. The control board has been reworked several times as features have been developed and bugs worked out. Several different LCD screens have called the case home during the development of the hardware. Also, the audio hardware has seen quite a few changes as we have worked to create a satisfying audio experience.
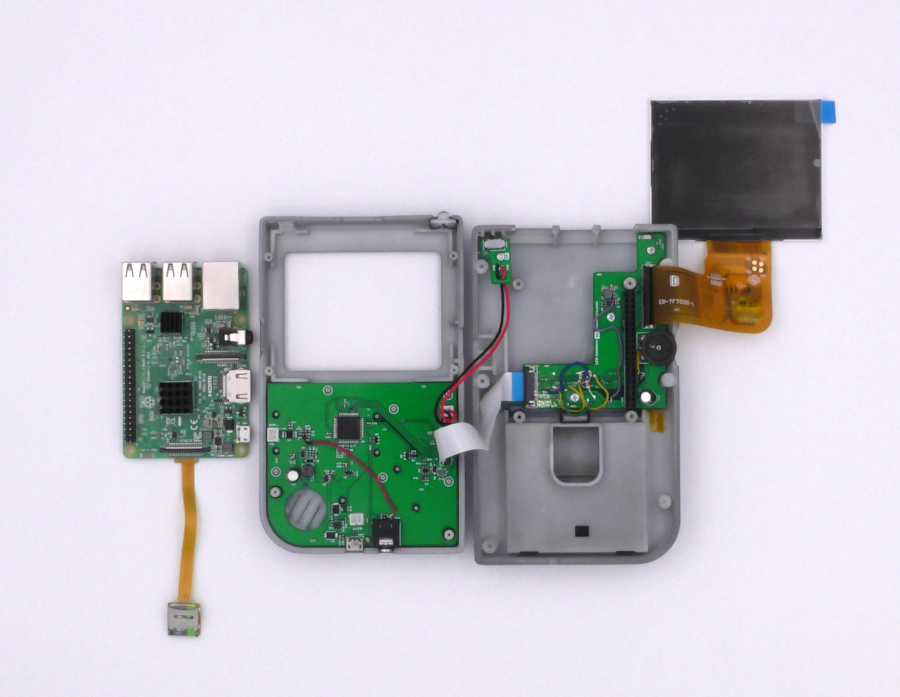
Figure 1: The internals of the PiBoy. Note the Raspberry Pi used in the build.
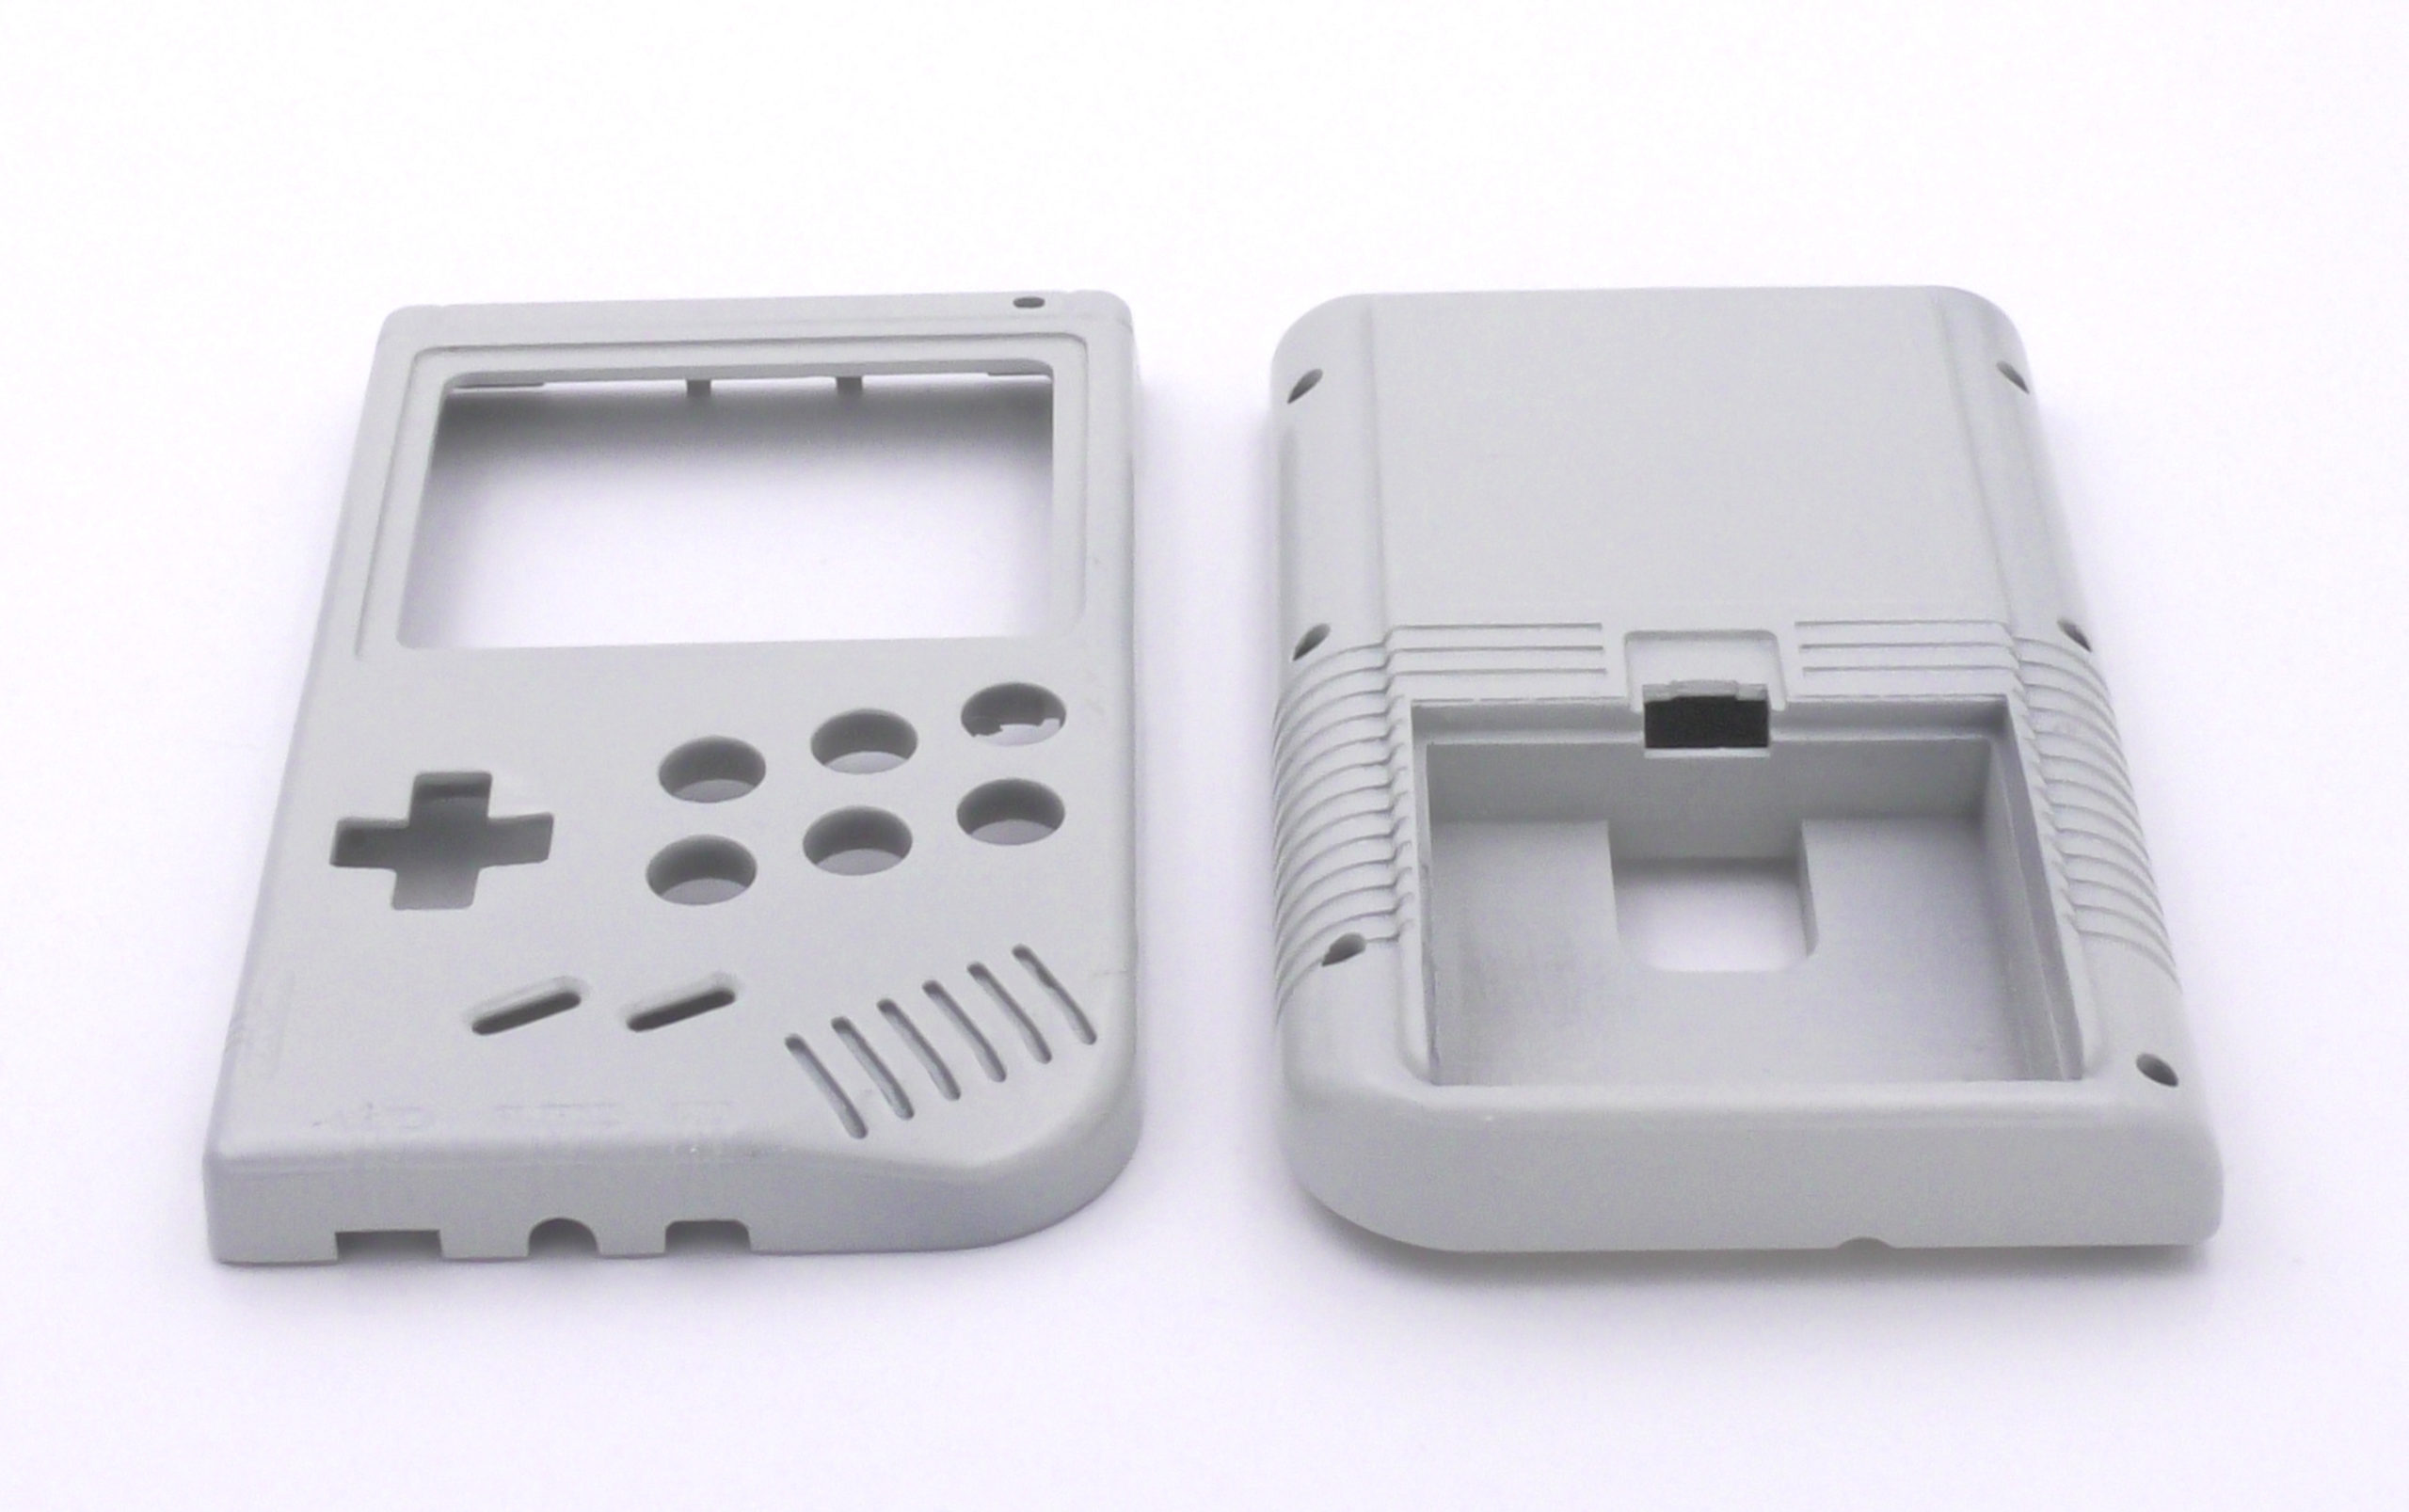
Figure 2: A late prototype of the PiBoy case.
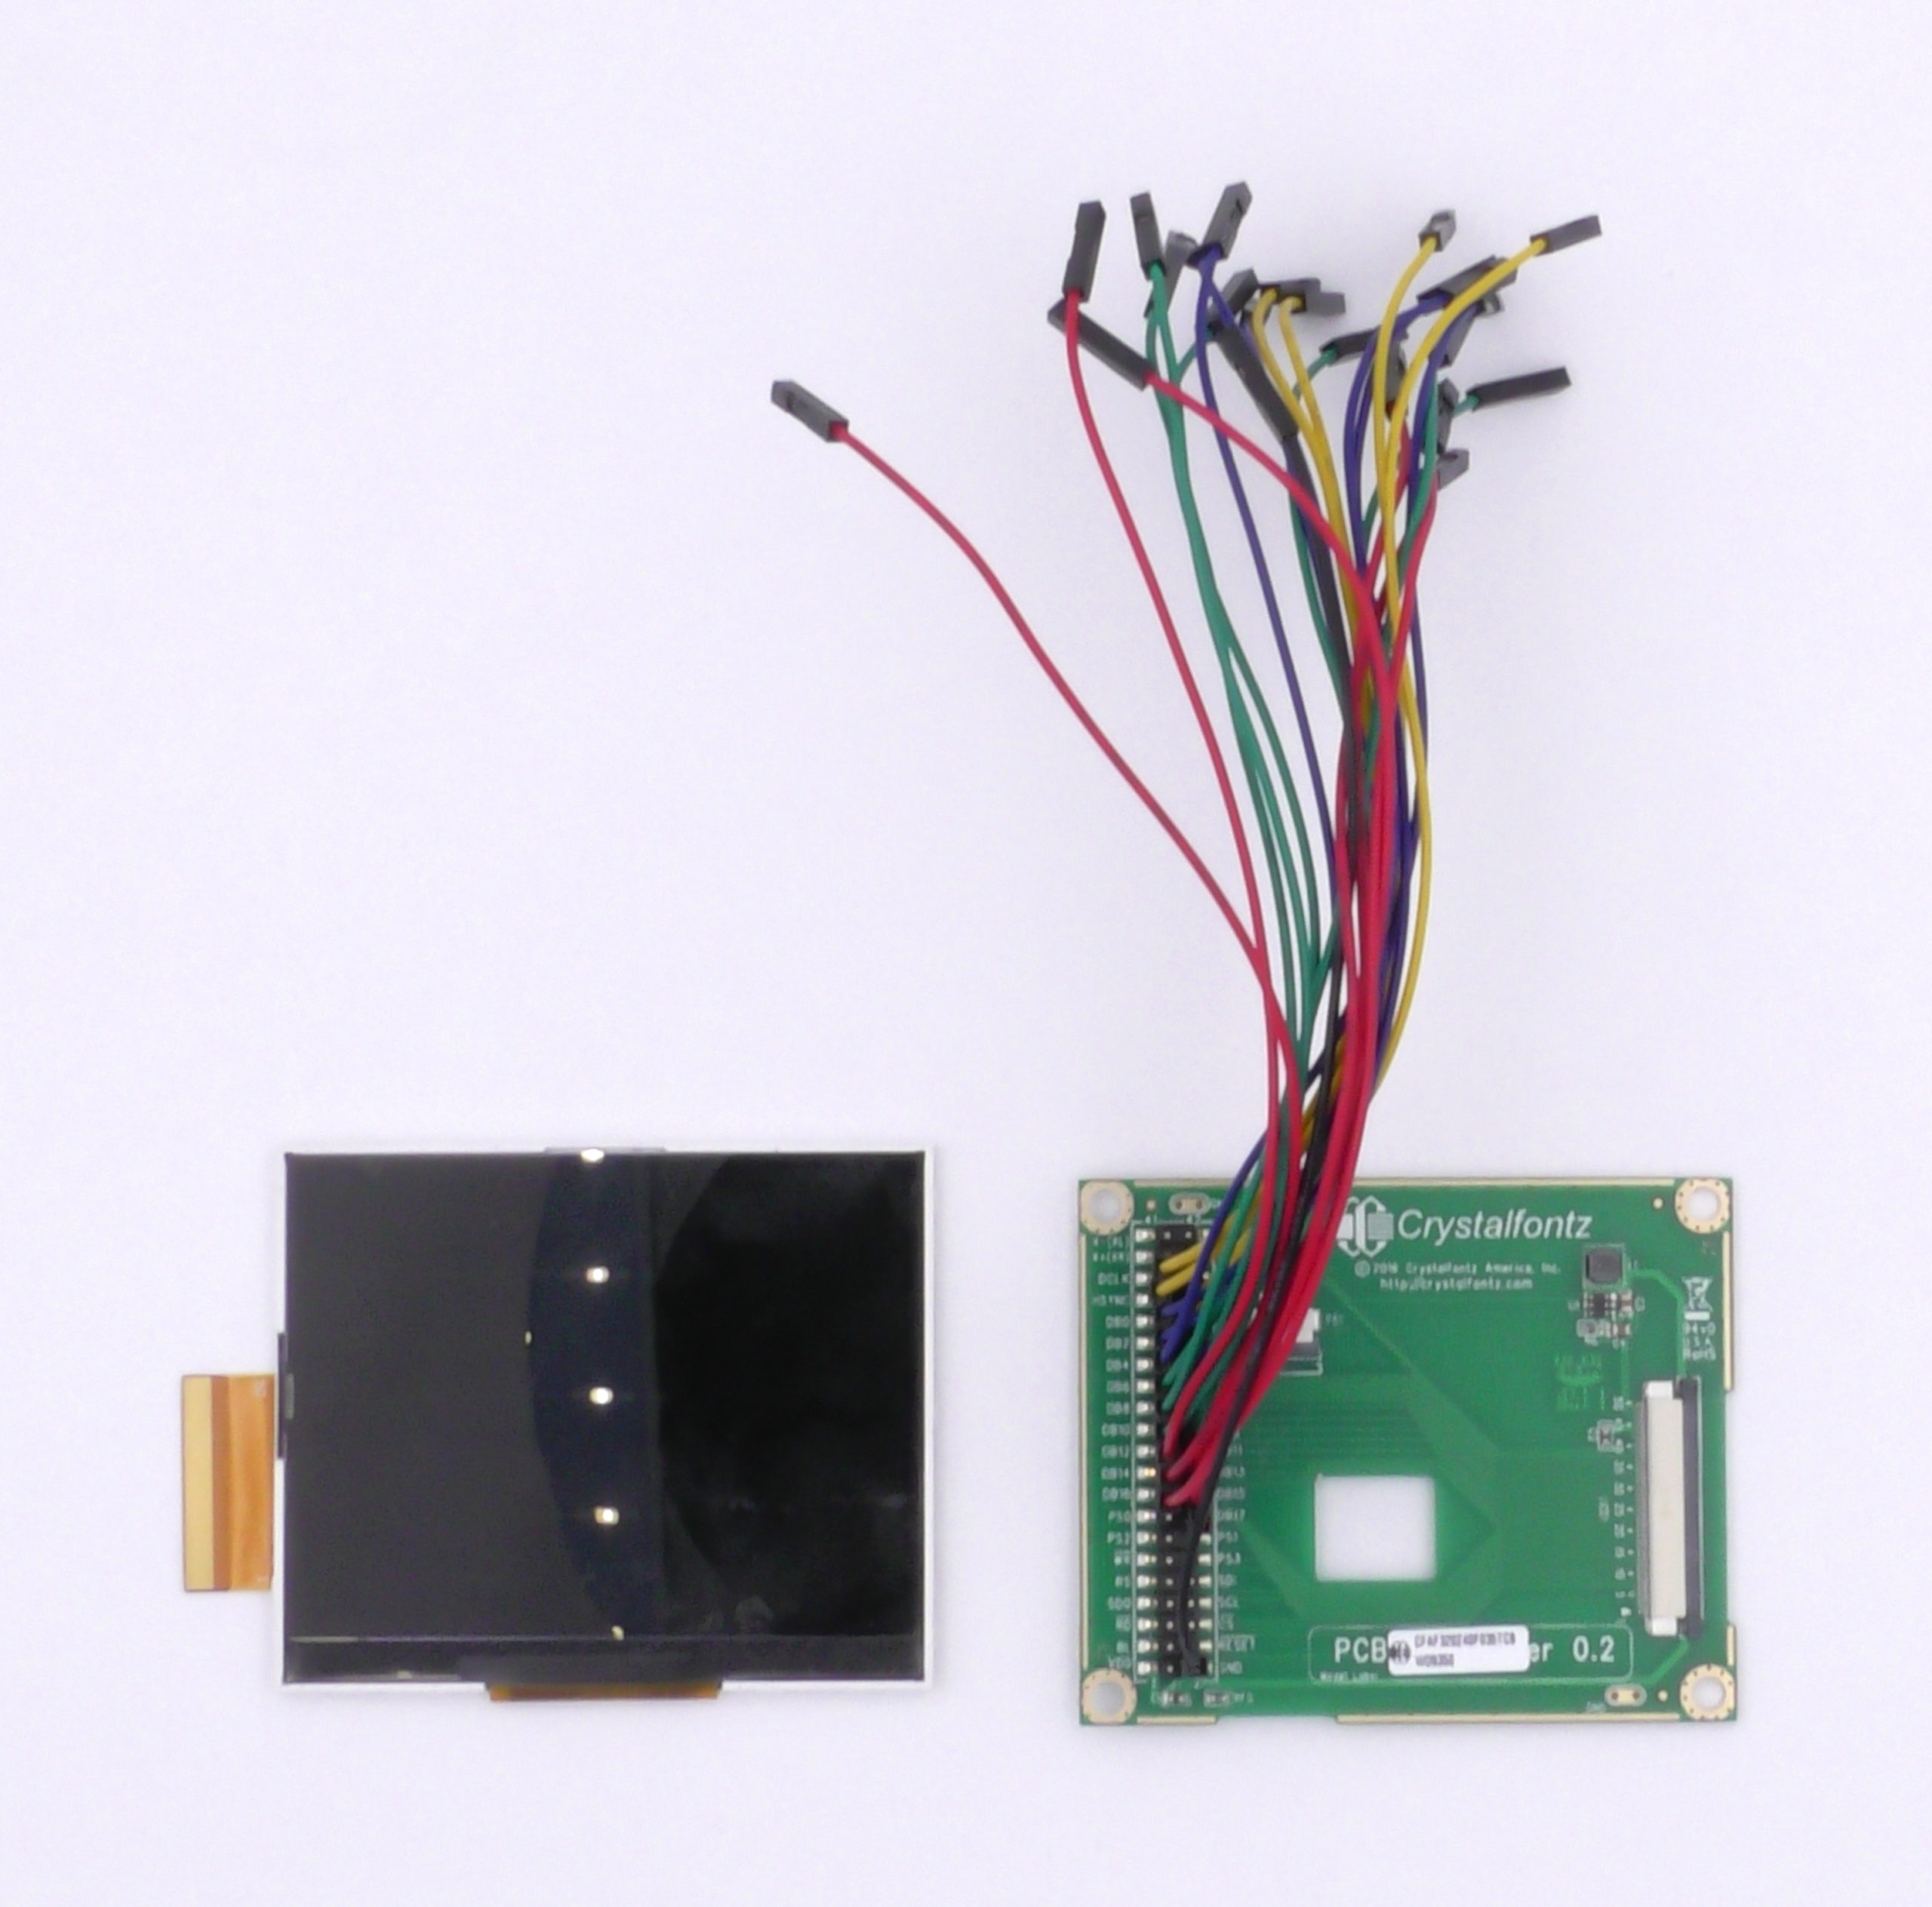
Figure 3: An early version of the screen and the breakout board for testing it.
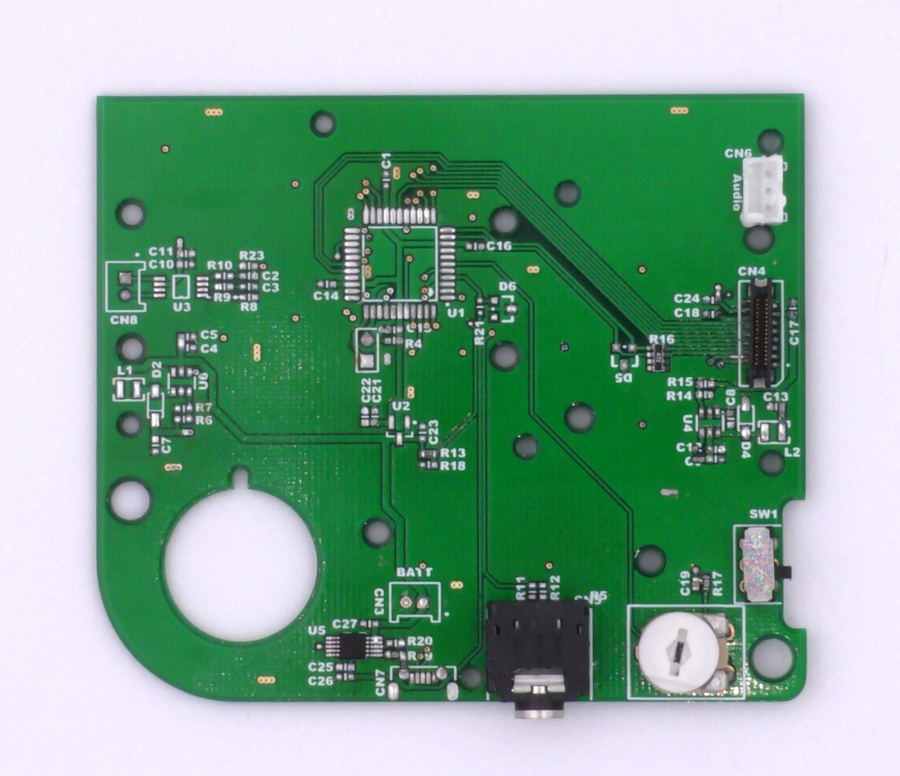
Figure 4: A prototype version of the PiBoy’s control board.
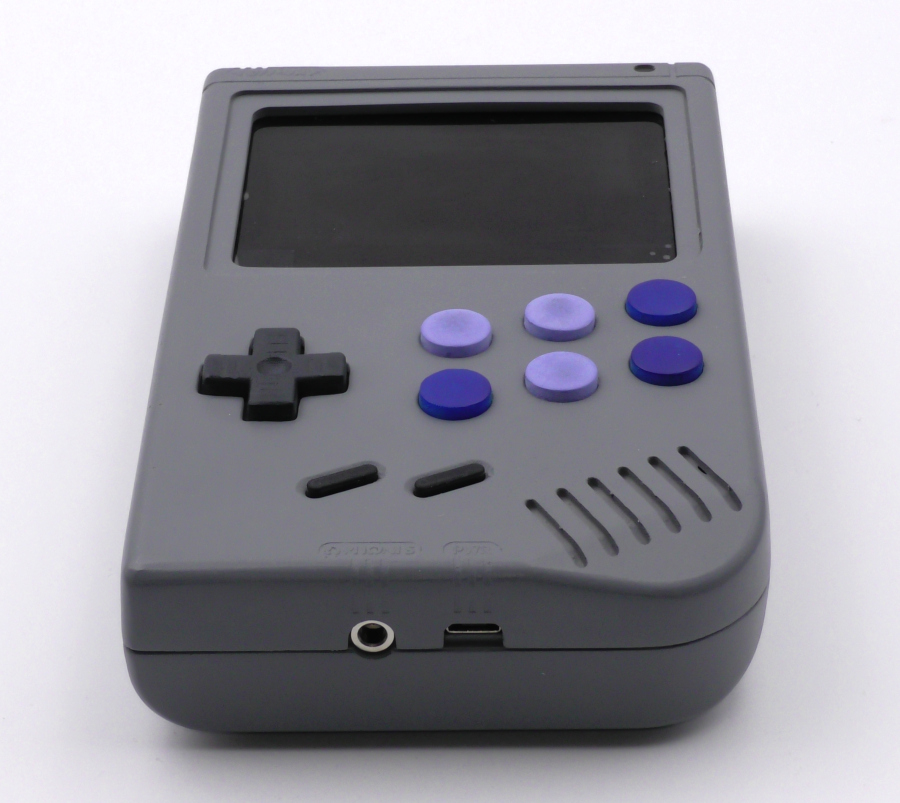
Figure 5: The current prototype of the PiBoy assembled.
