
Figure 1: The firmware for the PiBoy can be updated as newer versions are released.
This article covers updating the software on a PiBoy that has already been previously set up correctly. The osd and shutdown scripts should be updated before the firmware is updated. Unzip the folder once you’ve downloaded it.
Updating all of the software on the PiBoy is useful for upgrading to new features in updates released by Experimental Pi. Besides new features, new software releases may also contain fixes for problems that have been found. Follow the instructions below, in order, to update all of the Experimental Pi specific software on your PiBoy.
Download the Complete Software Pack
1. Download the new firmware and osd scripts from here. All of the software needed to do a complete update is combined in this download.
Update OSD and Shutdown Software
1. Remove the micro SD card from the PiBoy and insert the card in to a computer.
2. Open the card in the file explorer of the computer. You should be in the /boot directory once the card has been opened.
3. In the unzipped folder containing the firmware and scripts open the folder called “SDInstall”.
4. Move all of the files in the inner folder to the /boot directory on the sd card. The config.txt file will be overwritten, if prompted allow it.
5. Open the cmdline.txt file with a text editor
Remember no newline are allowed in the file, all of the text must be on one line. The text to add can also be found in the README.txt file in the folder unzipped earlier.
6. Add the following text to the end of the first line in the file.
init=/bin/bash -c “mount -t proc proc /proc; mount -t sysfs sys /sys; mount /boot; source /boot/unattended”
7. An internet connection may be necessary for the installation to complete. The easiest way to connect the PiBoy to the internet is to connect an ethernet cable between the PiBoy and your router. However, you can add your wifi credentials to the one-time-script.conf file. Open the file and enter your network name and password in between the quotes in the fields labelled “new_wifi_ssid” and “new_wifi_password”. Remove the “#” character from in front of each field and then save the changes to the file.
8. Safely eject the sd card from your computer.
9. Insert the sd card in to the PiBoy and turn it on. The PiBoy will go through several boot/reboot cycles before it is ready. This process can take several minutes. If the PiBoy DMG is connected to an external screen via the HDMI out feature you can watch the boot cycling process. Optionally, you can hold down the Start button when turning the PiBoy DMG on to force the display to show the installation process.
Updating Firmware
1. In the combined firmware and script folder you unzipped at the beginning of this tutorial open the folder named “PiboyUpdate”. This folder contains everything needed to update the firmware.
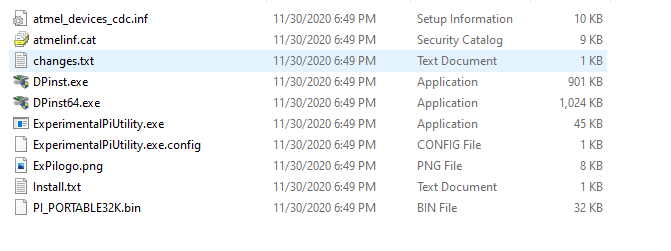
Figure 2: The contents of the firmware folder.
2. Install the USB driver for your system. If you are running a 32-bit version of Windows use the DPinst.exe and if you are running a 64-bit version of Windows use the DPinst64.exe. Double clicking on the file will start the installation process.
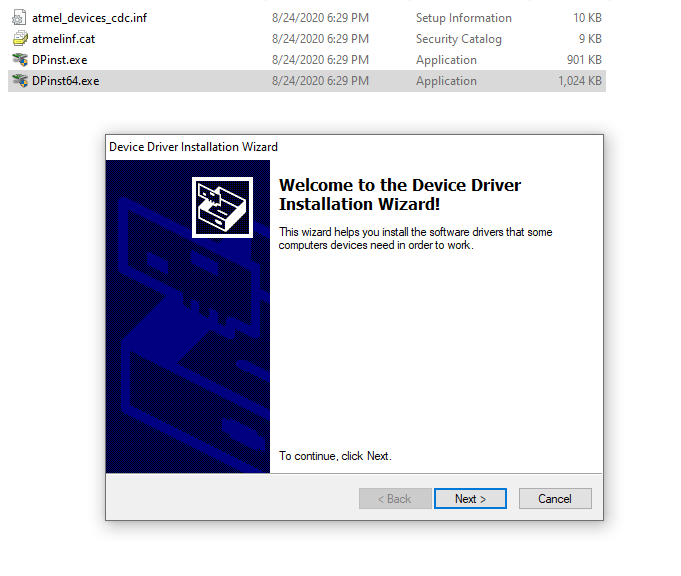
Figure 3: Installation of the USB driver.
3. Make sure the PiBoy’s power switch is in the off position.
4. Plug a micro USB cable in to the PiBoy.
5. Plug the other end of the micro USB cable in to the computer being used.
6. Open the folder and locate the file called ExperimentalPiUtility.exe. Double click on the file to start the firmware updater.
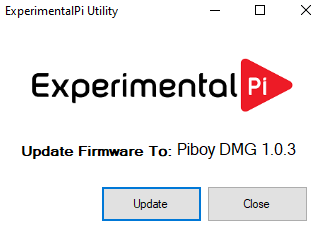
Figure 4: The firmware flashing application started.
7. Click “Update” in the application to flash the firmware.
8. A progress bar will show the flashing process and then close and return you to the application once flashing has finished.
9. If the firmware fails to flash you may need to put the PiBoy in bootloader mode. Press the joystick in until it clicks and hold it down while turning the PiBoy on. Release the joystick button. The power LED should begin to flash red. Once again run the firmware loader application.
10. Close the firmware loader application.
11. Disconnect the USB cable from the computer and from the PiBoy.
12. Turn the PiBoy on and allow it to go through the process of boot cycling to install the new firmware.
Article last updated on: 10 Nov 2021
