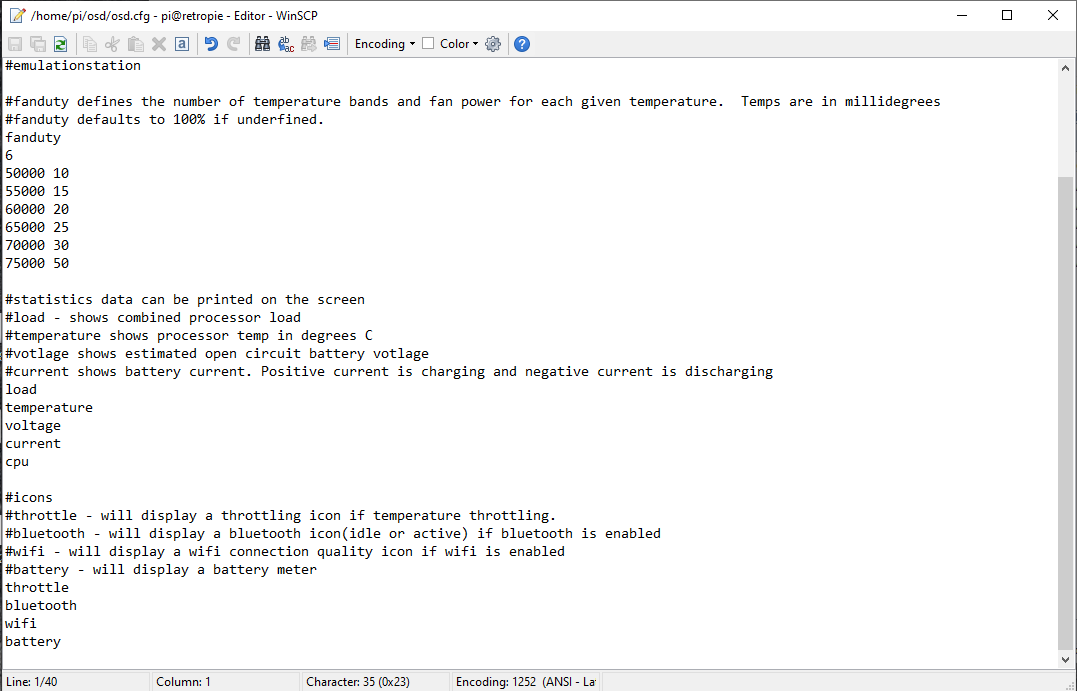
Figure 1: The contents of the file used to configure the OSD.
The PiBoy DMG features custom software to display an On Screen Display (OSD) of several values such as network status, current draw and battery status. What is displayed by the OSD is customizable by the user. This tutorial explains how to customize the OSD.
Determine Firmware Version
1. You’ll need to determine the firmware version your PiBoy is running as the steps for OSD customization have changed between software releases.
2. Turn the PiBoy on and watch for the splashcreen where the Experimental Pi logo is shown. At the bottom of the splashscreen the firmware version is displayed in text as “Firmware Version: x.x.x”. If the version displayed is version 1.0.3 or newer follow the instructions below for version 1.0.3 or newer. If no version is shown or the version is displayed as 0.0.0 follow the instructions for version 1.0.2 or older.
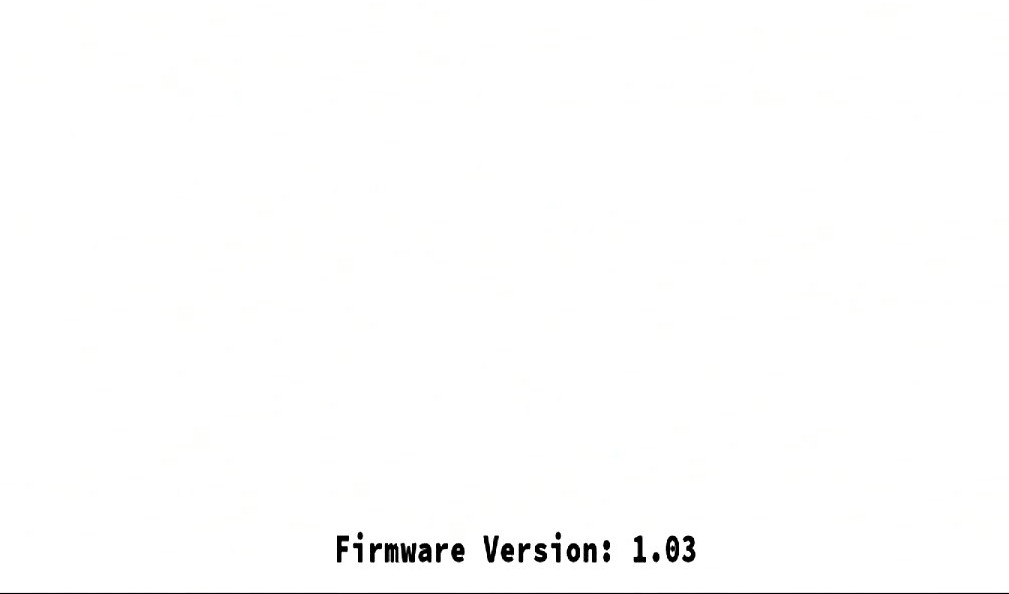
Figure 2: The firmware version displayed during booting.
Firmware 1.0.3 or Newer
1. Turn the PiBoy off and removed the SD card. Put the sd card in to the card reader of a computer and open the SD card in the file explorer.
2. Double click the “osd.cfg” file to open it in a text editor.
Figure 3: The osd.cfg file opened.
3. The options for the OSD are explained in the file’s comments. To activate a feature remove the “#” character from in front of the option. To disable a feature place a “#” character in front of the option.
4. Save the file to commit the changes. Close the text editor.
5. Safely remove the SD card from the computer and put it back in the PiBoy.
6. Turn the PiBoy on and the changes will be applied during booting.
Firmware 1.0.2 or Older
1. First, make sure that the PiBoy is connected to your wireless network and that SSH is enabled.
2. To alter the OSD you’ll need to remote in to the PiBoy. WinSCP is the program you’ll use to do so. Download WinSCP from here. Once downloaded, install the software on your computer.
3. Turn the PiBoy DMG on.
4. Open the WinSCP program.
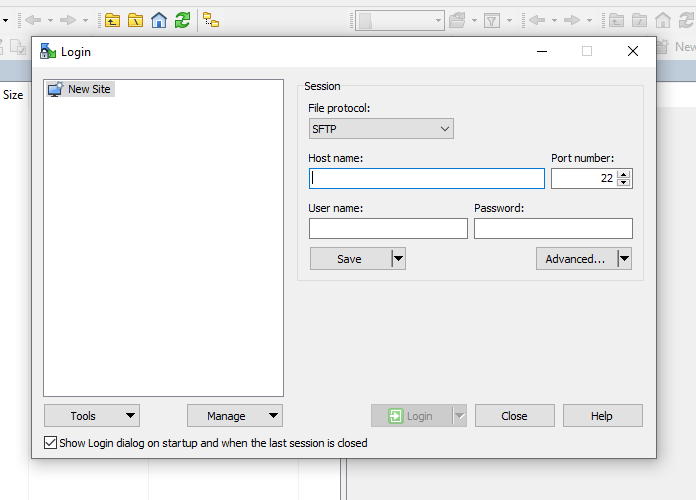
Figure 4: WinSCP started for the first time.
5. Enter the login information in WinSCP. Listed below are the login details.
File protocol: SFTP
Hostname: retropie
Port number: 22
Username: pi
Password: raspberry
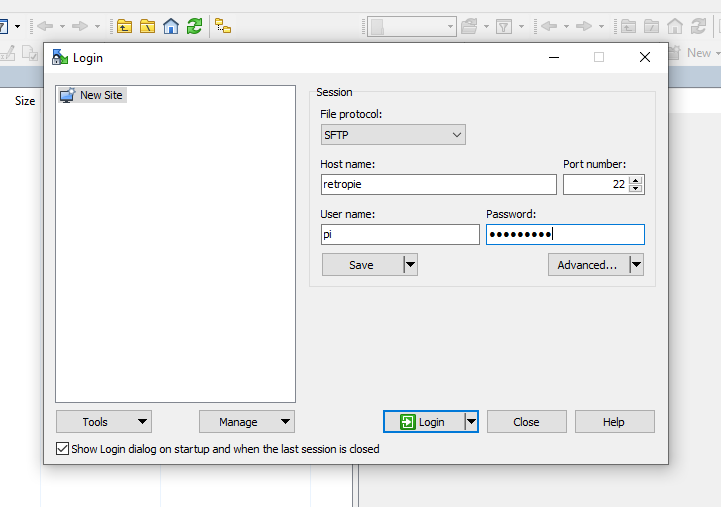
Figure 5: The login information entered in to WinSCP.
6. Click the “Login” button to connect to the PiBoy.
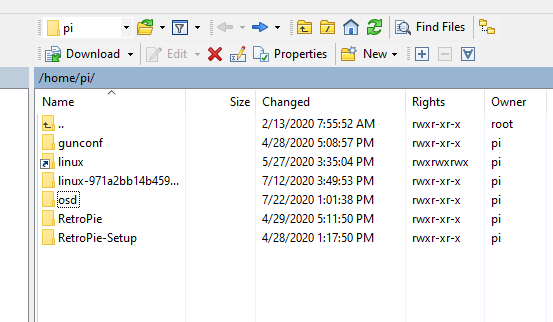
Figure 6: WinSCP logged in to the PiBoy. The right hand window shows the directory structure of the sd card.
7. In the right hand window you’ll see the directory structure of the PiBoy’s SD card. Navigate to “/home/pi/osd”.
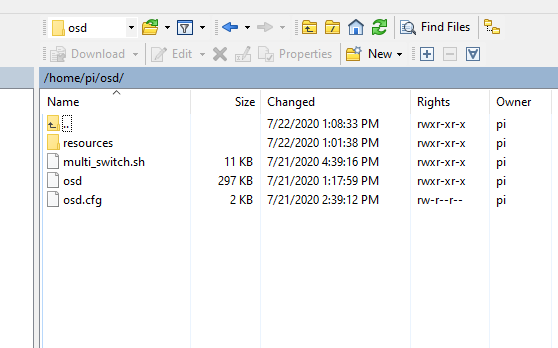
Figure 7: Inside the /home/pi/osd directory.
8. Double click the “osd.cfg” file to open it in a text editor.
Figure 8: The osd.cfg file opened.
9. The options for the OSD are explained in the file’s comments. To activate a feature remove the “#” character from in front of the option. To disable a feature place a “#” character in from of the option.
10. Save the file to commit the changes.
11. Disconnect from the PiBoy and close WinSCP.
12. Reboot the PiBoy and the changes you’ve made should be reflected in the OSD.
Article last updated on: 09 Mar 2021
